Choosing software for focus stacking step two – basic retouching
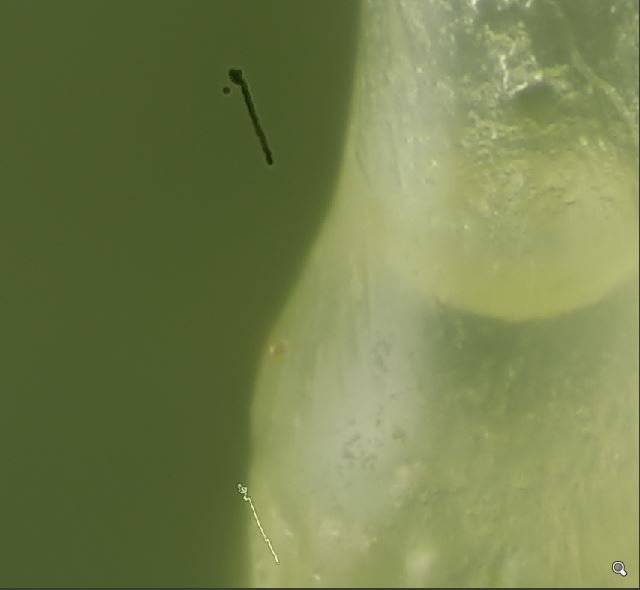
There are more nettles in our garden than supposed to be there, but close up the stinging parts are quite fascinating. Camera Canon EOS 6D, Nikon 10x TU plan fluor microscope lens.
There is almost no stacking that does not need some retouching after the stacking is done. It is therefore important that you choose a focus stacking software that fits your work process. I use Zerene Stacker when I need to do sub stacks to handle overlapping subjects like insect legs, antennas, bristles and so on. I use Helicon Focus when I want to use the set dust map function.
Dust trails

One common issue with focus stacking are small spots on the sensor or single pixels that does not function correctly. In this picture you can see one black dust trail that consist of a black dot copied from each one of the 225 pictures used for this stack. There is also a thin white line that is the dots from a hot pixel.
The dust/pixel trails can be handled before stacking in Adobe Camera Raw or Lightroom. I prefer if possible, to have a picture of a grey card in the end or in the beginning of my stack for white balancing. This grey card picture can also be used to handle the dust spots. Lightroom usually handles the hot pixels automatically. In the video bellow I show how to do white balancing and handle the dust spots.
When I am done with the grey card photo, I copy the settings to all the photos in the stack. This is the result using first Helicon Focus then Zerene Stacker – the problem is solved.


If you do not want to handle the spots in Lightroom or you find that Lightroom automatic handling of hot pixels missed some of them. Both Helicon Focus and Zerene Stacker have their own retouching abilities.
Note: Zerene Stackers non pro version ships with the basic retouching functions
Both Zerene Stacker and Helicon Focus can be bought as a pro version and a smaller and less expensive version. At this date – autumn 2019 – Zerene Stacker non pro version ships with basic retouching functions. Helicon Focus non pro version ships with the dust map possibilities but you need the pro version for retouching in Helicon Focus.
Retouching a spot
In the videos below I show how to retouch from one of the photos in the stack to the final picture. The videos just show removing a single bad pixel. First Zerene Stacker then Helicon Focus.
Retouching from one method’s output to another
Not using PMax or Helicon Focus method C tends to give pictures with less noise and better colours but with a lot of stacking artefacts near edges. These artefacts can be retouched using apicture from PMax or Helicon Focus method C. The videos below show how to do this, first with Zerene Stacker then with Helicon Focus 7.
Advantage Helicon Focus – set dust map
Helicon Focus have an interesting and useful function that lets you set a dust map picture. Here I used the original grey card with dust spots and hot pixels as dust map. Below is a comparison. Left picture without dust map, right picture with dust map. Stacked with Helicon Soft 7 method C.

Advantage Zerne Stacker – slabs

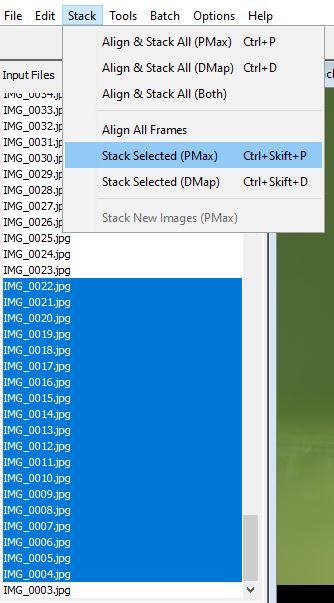
In Zerene Stacker it is quite easy to make sub-stacks or slabs. Just choose the photos that you want to stack and then stack them as a Stack Selected (PMax) or (DMap).
Below is a video that shows retouching using a DMap Slab.
Note – Helicon Focus can do slabs but the alignment is a problem
It is possible to make slabs in Helicon Focus. The problem is the alignment of the slabs. Sometimes the alignment works if the first picture in the stack is part of the slab – but not always. In this case it did not.
A tip about noise, PMax and method C
For better stacking result I usually do not sharpen the pictures before stacking but remove some noise. This helps especially if I want to stack with Zerene Stacker PMax or Helicon Focus method C. Both methods are pyramid stacking methods and tends to add noise.
